


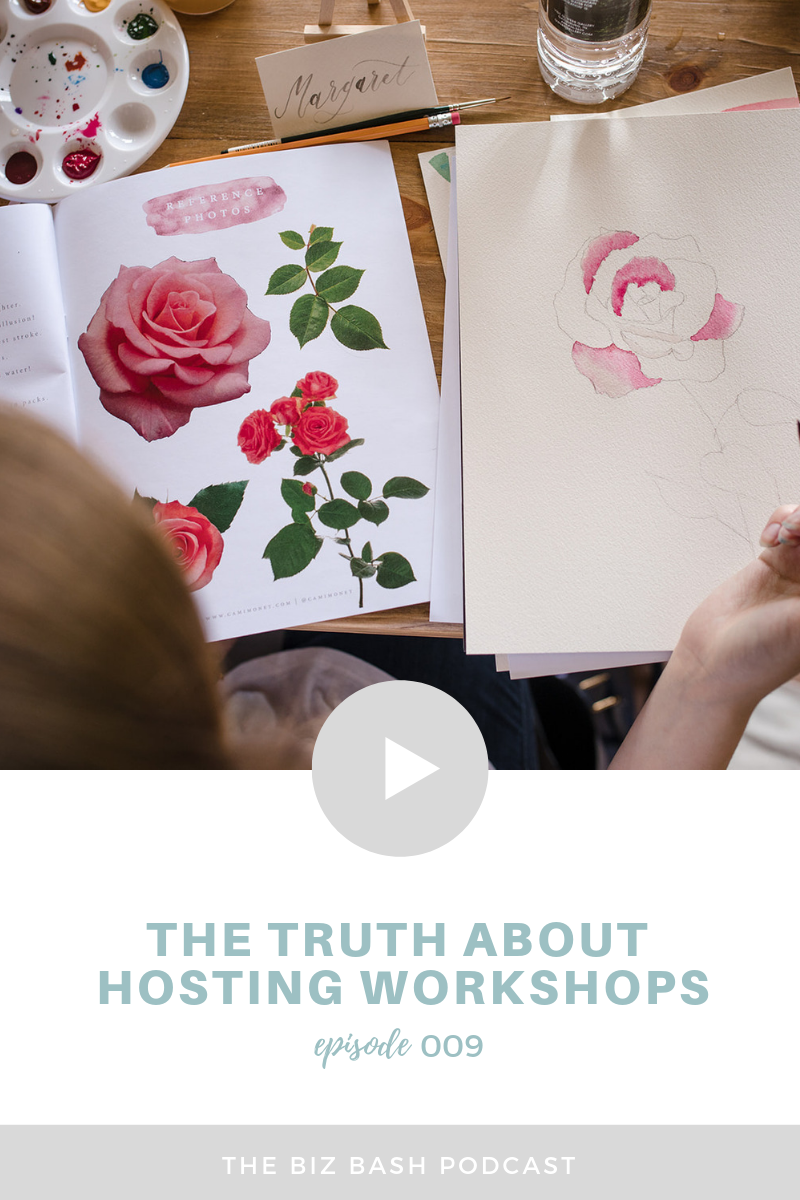
Let’s kickstart this episode by saying: WORKSHOPS AIN’T NO JOKE, Y’ALL. Cami & Elisabeth spill the beans on why workshops might not be all they’re cracked up to be and how to be prepared when you’re planning your own calligraphy or watercolor workshops. From booking a venue to pricing your tickets to getting booties in seats, this episode covers everything you need to know to have a successful, profitable workshop with happy students. (Spoiler alert: give ’em snacks)
Here are some of our top tips to get you started!
CREATE A BUDGET FOR YOUR WORKSHOP
If you’re going to plan a workshop, you have to know how much money you want to spend (and you have to know how much you will make if you, hopefully, sell out your seats). Ideally, your budget will be less than 50% of your predicted revenue. For example, if you decide to sell workshops seats at $150 a pop, and you want to sell 12 spots, your predicted revenue is $1,800. I highly recommend making sure that you’re not spending more than $900 (50%) of your expenses in this example.
This ensures that your net income for the workshop will be $900, provided you sell out. And trust me, with the work that goes into workshop, you’re going to want every penny. The more you can minimize your expenses, the better! Try to get wholesale on the materials you buy, as well as finding a space to rent for a super reasonable price (or host it at your home for free).
PLAN OUT YOUR TEACHING STRATEGY & CREATE YOUR WORKBOOK
Here’s something you should be aware of: it’s not cool to use someone else’s lettering worksheets to teach a workshop. We recommend making your own teaching materials so you aren’t infringing on anyone’s creative copyright! Cami made her workbook in Photoshop and I made my workbook in Illustrator. These are both Adobe design programs.
Creating a teaching workbook from scratch is not for the faint of heart, and it’s important to “sketch out” what you want this workbook to look like before you begin building it! Then, proceed with writing the copy for the workbook and begin creating the outline and calligraphy guides (or watercolor illustration examples) in the design program of your choice.
Once you get this step out of the way you will feel so much relief because you can continue to use this workbook over and over for every single workshop you want to teach! Along with your workbook you should be developing a teaching strategy. This varies from person to person, and one person’s teaching strategy might not match someone else’s. Take time to bullet point what points you want to touch on, and don’t forget to get in the mindset of a “newbie” because most people at your workshop will be learning these skills for the first time!
GATHER ALL MATERIALS, SUPPLIES, DECORATIONS, ETC.
Now it’s time to source everything for your workshop! Make sure you are buying supplies wholesale as often as possible, because this will save you a lot of money. Make sure you are adhering to your budget as closely as possible and keep track of all your expenses (they are business deductions after all).
You need to decide exactly what materials you will be giving to students and what they will need to accurately learn and practice what you are teaching them. Cami & I both allow our students to take home ALL their materials. Cami provides a tote for this and I provide a box.
When you’ve ordered everything you will have to assemble your workshop kits. This is a task that can take a few hours, so be prepared to set aside the time to do this. Make sure you have all other supplies, decorations, and other misc. items set aside for your workshop the day prior to the workshop to account for everything.
If you’re ready to start hosting your own workshops, but have zero idea where to start, then be sure to get your paws on Elisabeth’s Calligraphy Workshop Planning Guide and use code CUPCAKE5 for $5 off!
This printable organizer is your one-stop-shop to staying organized when planning your workshop. You’ll never have to be afraid of not knowing what your next steps are. This DIY guide includes a workshop to-do list page, a page to track the supplies you purchase (and their cost), financial projections, a marketing plan, a student sign-up tracker, resource list and more! The best part? You can print this guide as many times as you need it and use it for EVERY workshop. Skip the post-it note planning frenzy and go for an organized & stress-free planning experience!
WHAT DOES THE GUIDE INCLUDE?
-
Immediate PDF Download, 10 Pages
-
Venue & date overview tables
-
Workshop supply guide (exactly where I source my materials for calligraphy workshops).
-
Workshop budget table
-
Supply purchase page for estimating costs & filling in final costs
-
Workshop to-do list for overall tasks and week-of tasks
-
“What will you charge” logistics
-
Financial projections page
-
Student sign-up tracker
-
Marketing plan page
-
Does NOT include teaching curriculum.


+ show Comments
- Hide Comments
add a comment